
Home | Repair | Mobile Home Parts | Loans/Buy/Sell | About MHD
MHD en español | Contact | Search
Using Peel and Seal to Repair a Roof
Pictures and descriptions of the repair
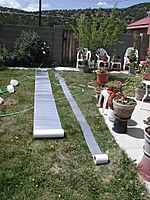
This shows you the strips of Peel & Seal™ unrolled to flatten. It was about 70 degrees and I am not sure this was totally necessary.
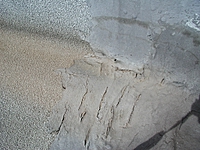
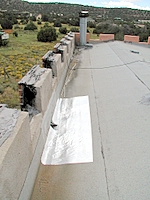
This is the parapet area where we have had ongoing leak problems. You can see the previous patchwork and what has happened to it. This section of roof is south facing near Albuquerque, New Mexico, USA so it gets incredibly hot in the summer.
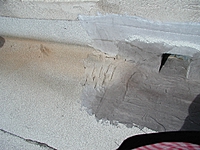
In this picture you are looking at the canale where water is supposed to drain through the parapet and off the roof. The dark area at the far left is where the leak problem actually originated. A tiny crack where two sheets of roll roofing didn't quite seal was the problem. The patchwork around the canale is only two years old and was done by an experienced professional roofer. You can see how quickly it is drying out and cracking.
Here you see the 6" strip of Peel & Seal we put at the base of the parapet. We elected to use two pieces of Peel & Seal because I thought it would be easier to get a tight fit to the wall this way.I had visions of an 18" wide piece sticking at both edges and not being able to fit it tightly against the wall.
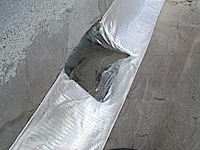
This is a close view of where we cut the Peel & Seal to make the opening for the canale.You can't tell from the pictures but the original roof repair installed a metal drainspout with flashing under the tar. If I had not known this metal was there I would have used more Peel & Seal on the sides and bottom of the canale.
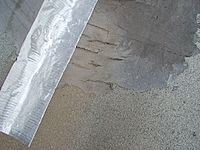
Here you can see the cracks still showing in the original repair. There is probably flashing metal from the drain under these cracks so if my budget was VERY tight I might not have done any more work immediately.I would have worried though and planed to complete the job as soon as possible.
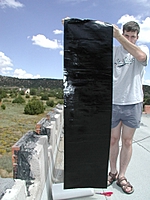
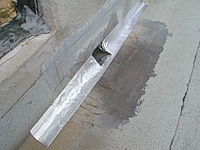
Here is the 18" by 6' piece of Peel & Seal with the backing removed, ready to be put down. Since there were two of us and the installation required us to fold the material to fit agains the wall, we elected to cut the material and remove the backing before we put it in place.
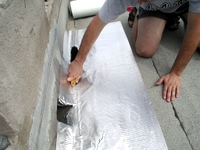
The last piece of Peel & Seal is now in place and we are smoothing with our hands to make sure we get a good bond to the existing roof. By using two pieces like this we make sure there is extra material at the lowest point where water is likely to pond. It also makes sure there is a really good seal between the two pieces.

Getting the second layer in place.
The finished project. In New Mexico we may have to wait a few weeks/months before we have enough rain to be sure the leak is really fixed. We have had a couple of light showers since this was done and it seems to be holding. Maybe now it is safe to work on repairing the drywall inside.